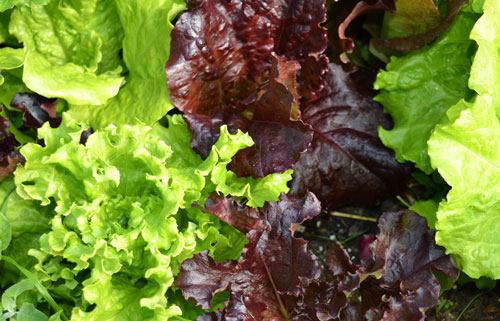
We Grow Garden Early June 2015

Week 1: June 6, 2015

We Grow Garden Early June 2015We love eating the first veggies from the spring garden, fresh lettuce being the ultimate after a long winter! Enjoy the greens while they last, because when the heat turns on, the lettuce turns bitter.

This week, it is with great excitement – and anxiety – that we prepare your first farm shares. We are learning quickly that there is no time to waste in the spring. This week, we are getting all the warm weather transplants in the ground, doing more direct seeding and trellising cukes and peas. We lost most of our second crop of radishes to root worms. We’re working on number three now with our fingers crossed.

We’ve learned a lot about farming in a high tunnel this spring. We probably under-utilized this tool, but have more plans for this fall and beyond when the tomatoes and cucumbers have run their course. We did not realize how well the early greens and radishes would do inside. But alas, we are catching up and look forward to the things to come. Rest assured that when the harvest season is in full swing, our farm members will reap the rewards.

Again, we thank you for taking stake in our fledgling farm adventure. Please bear with us as we stumble through our first CSA season, dealing with freshly turned ground and going thru organic certification. Let us know if you have any questions about what is in your first farm share and please follow We Grow LLC on Facebook if you can. We encourage you to use this platform to let other farm members know what you are doing with your produce. It’s a great way to share ideas and we all benefit.

With dirt under our nails,

Eric & Rebecca

Week One 2015 Newsletter

Click on the link above to view this week’s newsletter in it entirety including a list of what’s in your crate and what we know about each of these items. Plus, a quote from our youngest farmhands.

Recipes

Rhubarb Sour Cream Cake Recipe

Rhubarb Cream Cheese Bar Recipe
Rhubarb Orange Zest Jam Recipe

Rhubarb Sour Cream Cake

This recipe is adapted from one of the best Martha Stewart recipes I’ve ever come across. I’ve got a few variations, but you can find a link to the original recipe at the end of this post.

Ingredients

For the Topping

  • 4 tablespoons unsalted butter, melted
  • 1/2 cup all-purpose flour
  • 1/4 cup sugar
  • 1/4 teaspoon coarse salt

For the Cake

  • 1 1/2 sticks unsalted butter (1 stick goes into batter, 1/2 stick goes under rhubarb in pan)
  • 1 pound rhubarb, trimmed and cut diagonal about 1/2 inch thick
  • 1 3/4 cups sugar (3/4 cup over rhubarb and 1 cup in cake batter)
  • 1 1/2 cups all-purpose flour
  • 1 1/2 teaspoons baking powder
  • 1 1/2 teaspoons coarse salt
  • 1/2 teaspoon finely grated orange zest plus 1 tablespoon fresh orange juice (optional)
  • 2 large eggs
  • 1 cup sour cream

Directions

Step 1

Preheat oven to 350 degrees. Make the topping: Stir together butter, flour, sugar, and 1/4 teaspoon salt until moist and crumbly. I like to throw this into my mini chopper if using cold butter.

Step 2

Make the cake: Grease a 9-inch round cake pan (2 inches deep). Place 4 tablespoons butter cut into pieces into the bottom of the pan. Toss rhubarb with 3/4 cup sugar and spread in bottom of pan over butter.

Step 3

Mix your cake batter: Whisk together dry ingredients which are flour, baking powder, and 1 1/2 teaspoons salt. In stand mixer, beat one stick butter and one cup sugar on medium speed until pale and fluffy. Beat in zest and juice. (I rarely have oranges in the house, so I add one tablespoon of lemon juice instead.) Beat in eggs, one at a time, until incorporated, scraping down sides of bowl. Beat in flour mixture in three additions, alternating with sour cream, until smooth. Spread evenly over rhubarb. Crumble topping evenly over batter.

Step 4

Bake until a toothpick inserted into the batter in the center comes out clean and top springs back when touched, about 1 hour to 1 hour and fifteen minutes. Let cool for 10 minutes. Run a knife around edge of cake, and invert onto a large plate. It will be very juicy unless you have a leaky spring form pan like I do! Let cool completely if you like to serve with whipped cream.

Note: I have been making this recipe in a spring form pan the past few years to make it easier to get out. Sometimes I flip it over, but not all the time. We have made this over the campfire in the dutch oven many times. A show stopper for sure!

Link to original recipe: http://www.marthastewart.com/344240/rhubarb-upside-down-cake

Rhubarb Orange Zest Jam

Rhubarb Orange Zest MarmaladeIngredients

  • 2 pounds of rhubarb
  • 5 cups sugar
  • 2 oranges
  • 1 package liquid pectin

Weigh, wash and dice your rhubarb in small pieces. They will retain size in final product, so I like mine very small so the jam is less chunky. Do what you prefer.

Zest one orange. You want to end up with about 2 tablespoons of zest. You could also use a fine cheese grater if you don’t have a zester.

After zesting, squeeze the juice from both oranges. You should end up with close to 1 cup of juice.

Combine orange juice, diced rhubarb and zest in a large stock pot and simmer covered for 3 minutes. Turn off the heat and leave this steam for another few minutes or until rhubarb is tender and becoming soft.

Add sugar. Bring to a boil while stirring.

When mixture is fully boiling add 1 package liquid pectin. Return to a boil and boil hard for 1 minute.

Skim foam if necessary.

Fill hot jars with hot jam leaving 1/4 inch head space.

Pack and process according to water bath canning instructions.

Processing time

1/2 pints or pints:

  • Process for 10 minutes if you are below 6000 ft elevation.
  • Process for 15 minutes if you are above 6000 ft elevation.

In the photo, my batch looks a very beautiful orange color. I chose the reddest stems and used the very bottom of each stem where it goes into the soil – this pinkest part. This is what made it more orange and less green. Color isn’t a deal breaker for me, but be aware that green rhubarb, while tasting delightful, will make a different colored finished jam.

Members Update 2015

Your 20 weeks of garden shares will officially start the first week of June, but we will begin selling at the Medford Market on Saturday, May 9.

CSA shareholders get first chance to buy We Grow products. If you are a member, let me know what you would like and I will put your name on it. Please indicate how much of what you want and where you will pick it up. Contact me one of three ways:

  1. Contact us via email using our website form
  2. Send a text message to 715-905-0431
  3. Call at home 715-427-1002 (please don’t call after 8:00 pm TY!)

PICK-UP OPTIONS: Let us know in advance if you want to pick-up after the Saturday morning market so we save you what you want. We will have your produce available for pick-up at the Saturday market in Medford 8:00 am to 1:00 pm or on the farm Friday between 5:00 pm and 7:00 pm or Saturday from 1:30 to 3:00 pm. Please don’t call our home later than 8:00 pm.

Product Offerings Week of May 4th

Red/Green Leaf Lettuce Mix
$3.00 per 1/2 lb bag

Red and Green Leaf Lettuce

Spinach
$3.00 per 1/4 lb bag
$6.00 per 1/2 lb bag

Spinach

Gemstone Mustard Greens (aka spicy greens – like a little horseradish kick in your lettuce)
$2.00 per 1/4 lb bag
$4.00 per 1/2 lb bag

Gemstone Spicy Greens

Cherry Belle Radish
$1.00 per bunch

Cherry Belle Radish

Rhubarb
$2.00 per lb (1 lb = approx. 3 cups chopped)

Chives
$1.00 per bunch

Medford Market Details

The Medford Farmers Market will be starting this Saturday, May 9 from 8:00 am to 1:00 pm. The Saturday market is located at the Taylor County Fairgrounds at the intersection of highways 64 and 13. The market is anticipated to run through October. We are allowed to leave the market before 1:00 pm if we sell out, so please plan to come early in case we have the opportunity to head home.

The Medford Downtown Farmers Market will start Tuesday, May 19 from 1:00 pm to 5:30 pm at the municipal parking lot located just off highway 64 in downtown Medford. This market is anticipated to run through September.

Rib Lake Market Details

There have not been any solid commitments from other producers who are willing to sell at the Rib Lake Farmer’s Market. We Grow is still planning on selling there this summer beginning on Thursday, June 4 to coordinate with our first CSA share delivery. If you know any interested producers, please pass along my name and number.

Farmhouse Ham and Vegetable Chowder

We Grow Recipe - Farmhouse Ham Soup

Dried thyme and freezer corn drive the flavor in this chowder.

On the coldest days of winter, we turn to our hearty soup and stew recipes here at We Grow. In our attempt to expand our use of home grown ingredients, we’ve fallen across a really tasty cream based soup we would like to share with you. We dried a lot of thyme this summer, raised our own hogs, and packed away enough veggies for an apocalypse. Short of having a cow for cream, we can take credit for every ingredient here on our farm. We may be cheating a bit by not mentioning the ingredients within our freezer corn recipe, but I’ll let you check it out and decide if I am in violation of our local food obligation.

Ingredients

  • 2 cups diced cooked ham
  • 1 small onion coarsely chopped
  • 2 cups freezer corn
  • 1 large or 2 medium potatoes cut into 1 inch cubes
  • 1 cup sliced carrots
  • 1/2 tsp dried thyme
  • 2 cups broccoli florets
  • 1 cup ham soup stock (original recipe suggest using a can of cream of celery soup)
  • 1 1/2 cups cream or milk

Combine all the ingredients, except broccoli and milk. Cover and simmer for 15 minutes or until carrots and potatoes are nearly done. Add broccoli and cream for the last 5-10 minutes of cooking time. Chowder is ready when veggies are all tender, so plan cook times based on your varieties.

What we do to make this recipe “famous”:

  • I like my onions well cooked, so I fry them in the dutch oven with the ham for a few minutes before adding the rest of the ingredients.
  • When it comes time to add the veggies, I throw the carrots in the boil before the potatoes to give them a head start. That way, both root veggies are done at the same time.
  • Our recipe for freezer corn includes butter and sugar and this creates a unique, slightly sweet flavor when combined with the thyme that would not be achieved with a store bought frozen corn.
  • Potatoes are more flavorful with their skins left on, so we scrub ’em down and leave the skins on whenever possible.

Local Nutrition: Is Direct to Consumer More Healthful?

The following article is available at the Harvard School of Public Health website. Many of the statements made within this article are important facts that our consumers should know about why local food does have benefits over our conventional long haul food distribution system.

Click here to open Harvard School of Public Health PDF publication referenced >>

Final message taken from this article

While all of the factors affecting nutritional quality of fruits and vegetables – crop variety, production method, post-harvest handling, storage, and processing and packaging – apply equally to produce that is produced locally or on farms across the country, relying on local sources for your produce needs has some distinct advantages. First, even when the highest post-harvest handling standards are met, foods grown far away that spend significant time on the road, and therefore have more time to loss nutrients before reaching the marketplace.17 18 Second, farmers growing for a local (and especially a direct) market favor taste, nutrition and diversity over shipability when choosing varieties. Greater crop diversity from the farmer means greater nutritional diversity for the eater. Third, in direct and local marketing strategies, produce is usually sold within 24 hours after harvest, at its peak freshness and ripeness, making consuming them a more attractive prospect. Fourth, during this short time and distance, produce is likely handled by fewer people, decreasing potential for damage, and typically not harvested with industrial machinery. Minimizing transportation and processing can ensure maximum freshness and flavor, and nutrient retention.

Full article follows:

Squash Scones

Every fall, I cook down squash that I will keep handy in the freezer specifically for this recipe. All my boys love these squash scones. I’ve even had request to make them for a school snack last winter. Of course, I think they are best served with a hot cup of tea.

Every person’s results will be different as every squash has varying moisture content. If it doesn’t come out right for you the first time, try another variety.

Scone Ingredients

  • 2 cups all purpose flour
  • 1/4 cup plus 3 tablespoons granulated sugar
  • 1 tablespoon baking powder
  • 1/2 teaspoon salt
  • 1 1/2 tsp pumpkin pie spice OR
    • 1/2 teaspoon ground cinnamon
    • 1/2 teaspoon ground nutmeg
    • 1/4 teaspoon ground cloves
    • 1/4 teaspoon ground ginger
  • 6 tablespoons cold butter, cut into cubes
  • 1/2 cup squash puree
  • 3 tablespoons half-and-half
  • 1 large egg

Spiced Glaze Ingredients (substitute vanilla in place of these spices for regular glaze)

  • 1 cup plus 3 tablespoons powdered sugar
  • 2 tablespoons milk
  • 1/2 tsp pumpkin pie spice OR
    • 1/4 teaspoon ground cinnamon
    • 1/8 teaspoon ground nutmeg
    • Pinch of ground ginger
    • Pinch of ground cloves

Directions

  1. Preheat your oven to 425 degrees and line a baking sheet with parchment paper.
  2. Whisk together the pumpkin, half-and-half, and egg. Reserve.
  3. Sift together into a large mixing bowl the flour, sugar, baking powder, salt, pumpkin pie spices.  Add the cubed butter on top.
  4. Either using a pastry blender or the paddle attachment of your stand mixer on medium speed, mix the butter and dry ingredients until your reach the consistency of coarse cornmeal. Pieces of butter should be no larger than a small pea.
  5. Fold the wet ingredients into the dry ingredients.  You may have to use our hands to get that last bit of flour to incorporate into a well formed dough ball. The dough is not very uniform and that is acceptable.  The important thing is to make sure all the dry ingredients have been moistened well or the finished scone will be very crumbly.
  6. On a lightly-floured surface, flatten and form the dough into a 1” thick rectangle. Then using a sharp knife or pizza cutter, divide the rectangle into equal triangular pieces. I like to cut my rectangle in half, then thirds, then X each of the six pieces to make 12 scones. Feel free to make them smaller if you prefer, just shorten cooking time one or two minutes.
  7. Use a spatula to carefully place the triangles of dough on the parchment-lined baking sheet. Bake for 15 minutes, or until light brown. Remove to a cooling rack and let cool before icing.
  8. Make the powdered sugar glaze by blending sugar and spices, then add the milk until smooth. Drizzle glaze over the tops of the scones. You could also dip the scones in the glaze if it works for you.

Please be aware that you can use pumpkin puree, but not pumpkin pie filling. Pie filling already has the spices included.

Recipe adapted from shoeboxkitchen.com

What To Do with Winter Squash

I was given two Blue Hubbard seeds by my aunt this spring and both vines grew wonderfully!

I was given two Blue Hubbard seeds by my aunt this spring and both vines grew wonderfully! One fruit was 36 lbs!

Don’t be intimidated by a massive heirloom squash. It is the perfect end of season storage food. Put it in a root cellar and it will last for several months. Or, if you’re like us, wait until the weather cools, when your farm is tucked in for the winter. Now is the time to warm up the house. Cook the squash, save a little for dinner and a pie then put the rest in your freezer for use over the long winter months.

In 2014, I planted two blue hubbard squash seeds – one per hill. Standard blue hubbard squash is a very familiar, very old variety of squash. It has lost a lot of flair in the modern era simply because it is SO massive. Families don’t store food away like they used to when you can shop year round at a local grocery and, in most cases, there aren’t as many mouths to feed. Not to mention, they are difficult to lug around until you get them broken down.

So why did we bother to plant blue hubbards? Because the flavor and texture is one of our favorites! We’ve grown a lot of different varieties of winter squash on our farm and this one ranks pretty high on our list along with Musque du Provence. Our two vines produced a total of six beautiful fruits.

With careful worthiness consideration, I gave each one away to someone I hoped would use it. The last one, the largest one weighing in at 36 lbs, I kept for our family. This would be all the squash our family would need for the whole winter. We aren’t huge squash eaters, but we LOVE to bake with it as an ingredient replacement for pumpkin puree. I’m never ahead of schedule, ever, so having this puree ready to go and not in the form of a uncooked squash in the cellar is a deal maker.

Here’s How We Process Our Massive Blue Hubbard Squash

  • Wash the outside as best you can.
  • Put in the oven at 325º. You can leave it whole or cut it in pieces to speed up cooking time. I sawed mine in half.
  • Fork poke test for doneness. The flesh should be soft and easy to pierce with a fork.
  • Remove and let cool. Scrape flesh from skins and you’re ready to eat some squash.

At this point, you have to decide what works best for you. I like to run the puree through a strainer to create a consistent puree and also to remove some of the stringy texture. Then I divide the puree in half cup portions for baking our favorite scones and some in one or two cup portions for serving with a meal.

In total, our 36 pound squash produce 34 cups of puree in just a couple hours.

Week 19: October 9, 2014

Yukon gold potatoes

Parsley – a little extra for drying

Carrots – our favorite mix

Turnips

Green leaf lettuce

Red leaf lettuce

Mustard greens

Winter Onion

Winter squash

Dry calypso beans – FIRST TIME ON OUR FARM!!

Week 18: October 2, 2014

With the cool, wet summer weather we weren’t certain what to expect when we began to unearth our sweet potatoes. Much to our surprise, they are worth sharing with our CSA members. So after curing at a warm temperature for a few weeks for allow the skins to set and the starches to settle into their tasty natural sugary state, we are excited to share these with you. We haven’t been consistently successful in our sweet potato production. But they are well worth the effort. Let us know what you think or how you put sweet potatoes to use.

  • Sweet potatoes
  • Young red leaf lettuce
  • Arugula
  • Radishes
  • Garlic
  • Melon
  • Broccoli
  • Tomatillos – think salsa verde
  • Cilantro
  • Red onion

We Grow TomatillosRecipes:

Salsa Verde

Like most fresh salsas, this is a simple one.

What you’ll need:

  • Tomatillos
  • Cilantro
  • Red onion
  • Lime juice
  • Garlic (optional)

In the We Grow house, we wash, peel and roast the tomatillos, but roasting is completely optional. To roast them quickly, layer the clean fruits on a cookie sheet and put them directly under the high heat in your over (broiler) for about 8 minutes. What closely for that blackening to start but don’t over do it. An alternative would be to put the tomatillos on the grill to obtain a wonderful smokey flavor in your salsa verde.

Pulse the tomatillos in a food processor until they are to your desired texture. We chop for about 15 seconds. More time = runnier, less time = chunkier.

To the processed tomatillos, we add some coarsely chopped red onion, garlic, cilantro and lime juice. This is all to your taste and meant to be very simple. Enjoy as a tangy addition over any Mexican dish.

Sweet Potato Barley Pilaf

Another FAMOUS dish in the We Grow house. This only happened when we ran out of rice one time. The idea is that of a rice pilaf with whatever veggies you have on hand to add subtle flavors and colors. When we tried it with sweet potatoes, we’ve never found a variety we like better.

What you’ll need:

  • Barley or rice
  • Chicken broth
  • Sweet potato
  • Celery
  • Onion
  • Garlic
  • Carrot (optional)
  • Mushrooms (optional)

To a large pan, we sauté onion, celery and garlic in butter until tender. Then, carefully add 2.5 cups broth (we use bouillon from JLAR Valley) and 1 cup barley (or substitute rice). Bring to a boil and reduce heat to simmer. Barley takes longer to get tender than rice, so adjust accordingly.

After about 15 minutes, we add chopped carrot, fresh mushrooms and cubed sweet potatoes. Simmer for another 15 minutes or until veggies are tender. Will thicken as the barley rests.

Eating In Season, Eating Local Means Fresh

When you connect with the place your food comes from, you realize what it means to EAT IN SEASON. Not only do you have to get creative, but you indulge in the finer foods as the ripen and have an actual appreciation for what you eat. Very few of us actually eat entirely in-season, but it is worth doing what you can do. This article by Rochelle Bilow has a good summary of one’s experience working, living and eating in season on the farm.

I especially relate to a statement the author makes about deciding what to cook based on your available ingredients instead of paging through a cookbook.

“If you’re going to truly cook with the seasons, that means giving up some ingredients for part of the year. But that doesn’t mean you have to eat austerely: Surrendering to the garden’s harvest and dedicating yourself to using all of it will force you to become creative and might even put a new favorite dish on  your roster.”

– Rochelle Bilow, read the full article at BonAppentit.com

As more and more people realize the value in eating in season, we need to realize that what some call a modern movement is actually as old as agriculture. Whether we go bask to the early hunters-gatherers or simply look back at those hearty homesteaders who settled the American Midwest, you ate what was grown in your garden or your neighbor’s when it was fresh and when it was in season because there was little else to be had. It was a diet of necessity. In many parts of the world, people still go about deciding what they’ll have for dinner in a similar manner.

At our farm table, those first cucumbers taste SO good. Then we eat them for six straight weeks and we’re ready for a break. Sure, we could buy cukes at the grocery store all winter long, but they don’t really don’t taste as good as those fresh from the garden, they cost a lot, who knows how many chemicals were used to grow that perfect cuke in intensive agriculture environment, and not too mention the fossil fuels it took to bring that cuke 2,000 miles across the country. We can say the same about strawberry, lettuce, and much more.

The organic, local eating trend is gaining a serious following in upscale restaurants. Chefs are shopping at farmer’s markets on a daily basis for local, fresh ingredients and charging more than if the ingredients had been pulled out of a frozen cardboard box from their distributor. Food that is grown nearby tastes better because it is fresher. All chefs know fresh ingredients are key to good tasting food. It’s also healthier for you because nutrients are at their maximum when the source is nearby. And oftentimes these characteristics come with a premium price. But that’s what people are interested in right now and consumers are willing to pay for all the right reasons.